Introducing webpack
Web development chronicles

We’ll go through a chronology of front-end web development.
During the stone age, people would use vanilla javascript to do simple stuff: pop-up, small animation, etc. Front-end developers had to write obscure conditional statements to detect the host browser and then adapt their code to each browser. They always had the same question: “Can I use this feature?”
It was obvious to everyone by then that the browser gods were badly behaved. As such, the warrior jQuery rose up to tame them.
jQuery encapsulated behaviours behind a consistent API. At first, people would still do simple stuff with jQuery: some dynamic buttons, some AJAX.
But then, what some high-minded people called “web 2.0” came about. By then, everything should be JavaScript. The era of Single Page App (SPA) appeared. People stop calling a program, a “program”, but started calling it an “app”.
“Apps” grew more complex. So complex that jQuery alone as a dependency would not be sufficient. Some even chose to get rid of jQuery altogether. JS frameworks started to pop up: Angular, Backbone, Meteor, React, Vue to name a few out of the most popular ones.
These frameworks would do “client-side rendering”. Which is a practical way to name the despicable practice of stealing CPU cycles from your users to make up for cheaper servers.
Add to that that you may use any kind of CSS framework as will, like Boostrap, Foundation or Font Awesome.
Dependency management
As “apps” grew in complexities, so does dependency management. Any software enginner will tell you, you need to guarantee the full reproducibility of your build.
For that you need to explicitly records, not only your own code, but your exact dependencies as well.
Would you expect that the output of a car factory manufacturing a single model of car to be variable? Whereas one day the brand new car out of the factory would use “brake-magic v1.2.4”, the next day cars using “brake-magic v1.2.5” would be automatically out. As the car industry knows, each time you update a single dependency, the whole system must be audited again. “brake magic v1.2.5” may introduce a regression, or it may even contain malware.
Once the system is audited, you need to freeze all dependencies, until the next audit.
A lot of methods exist for front-end dependency management. Front-end is especially complex because of the way styles, JavaScript and other assets such as icons and images are intertwined together.
The easiest method is to copy-paste jquery-1.2.4.min.js (or whichever distribution
files your dependency provides) into your repository and link it using a <script></script> tag.
However, when you have tens of assets to manage this way, it quickly becomes very hard to manage.
You app will be filled by global variables. You will spend time checking if the js
libraries are included in the correct order (e.g. jQuery should be imported before Bootstrap,
which should be imported before Bootstrap UI).
When releasing for production, to minimize bandwidth, you will want to concatenate and
minimize all your JS files. However, you will need to record which version of what tool you used
during the release process to have a reproducible build.
Clearly, there must be a better way that doing all of the manually.
That is why serious front-end developers use two kinds of tools together: a dependency management
tool and a task runner.
The dependency management tool will resolve dependency graphs and fetch the right versions of your dependencies from (usually) trusted repositories.
The build tool will compile/optimize your hand-written assets into something the browser can deal with.
Dependency management tools
JS has had many dependency management tools. New ones are appearing every year.
| Tool | Pro | Con |
|---|---|---|
| bower | Very configurable. Just download your assets and you are responsible for importing them in your app | Deprecated for new projects in favor of npm/yarn |
| npm | Node’s default package manager | Historically known to produce tree-like non-reproducible build |
| yarn | Produce flat and deterministic builds. Faster than npm at time of writing. | As it is relativity new, community is smaller compared to the npm community |
We will not go into details for bower as even bower maintainers advise to refrain
from using it in new projects.
All these tools use node as runtime. You will need to install node first to run any of them.
npm and yarn are very much alike. They use the exact same package.json format,
so you can mostly replace one with the other in the blink of an eye.
I would choose yarn for a new project because yarn is faster and its yarn.lock
file to freeze dependencies is easier to visually parse compared to the package-lock.json
that newer versions of npm provide (probably npm >=5.x).
When you have a package.json like the one below in your working directory, just run
yarn install or npm install to install all your dependencies locally.
package.json
{
  "scripts": {
    "start": "node_modules/.bin/webpack --watch --mode=development --progress --profile --colors",
    "build": "node_modules/.bin/webpack --progress --profile --colors"
  },
  "dependencies": {
    "@fortawesome/fontawesome-free": "^5.3.0",
    "bootstrap": "^3.3.5",
    "jquery": "^2.1.4",
    "moment": "^2.20.1"
  },
  "devDependencies": {
    "css-loader": "^1.0.0",
    "file-loader": "^2.0.0",
    "manifest-revision-webpack-plugin": "^0.4.1",
    "style-loader": "^0.23.0",
    "webpack": "^4.17.1",
    "webpack-cli": "^3.1.0"
  }
}
Dependencies will be stored into the node_modules directory.
We will now see how the build tools are used to turn all this mess into something
usable by a browser.
Build tools
Did you see that we had some devDependencies? These dependencies comprise my build
tool of choice: webpack. Please be aware than many combinations of
altenatives exist (grunt,
gulp, browserify,
parcel, comparing all of them would make for another interesting blog post).
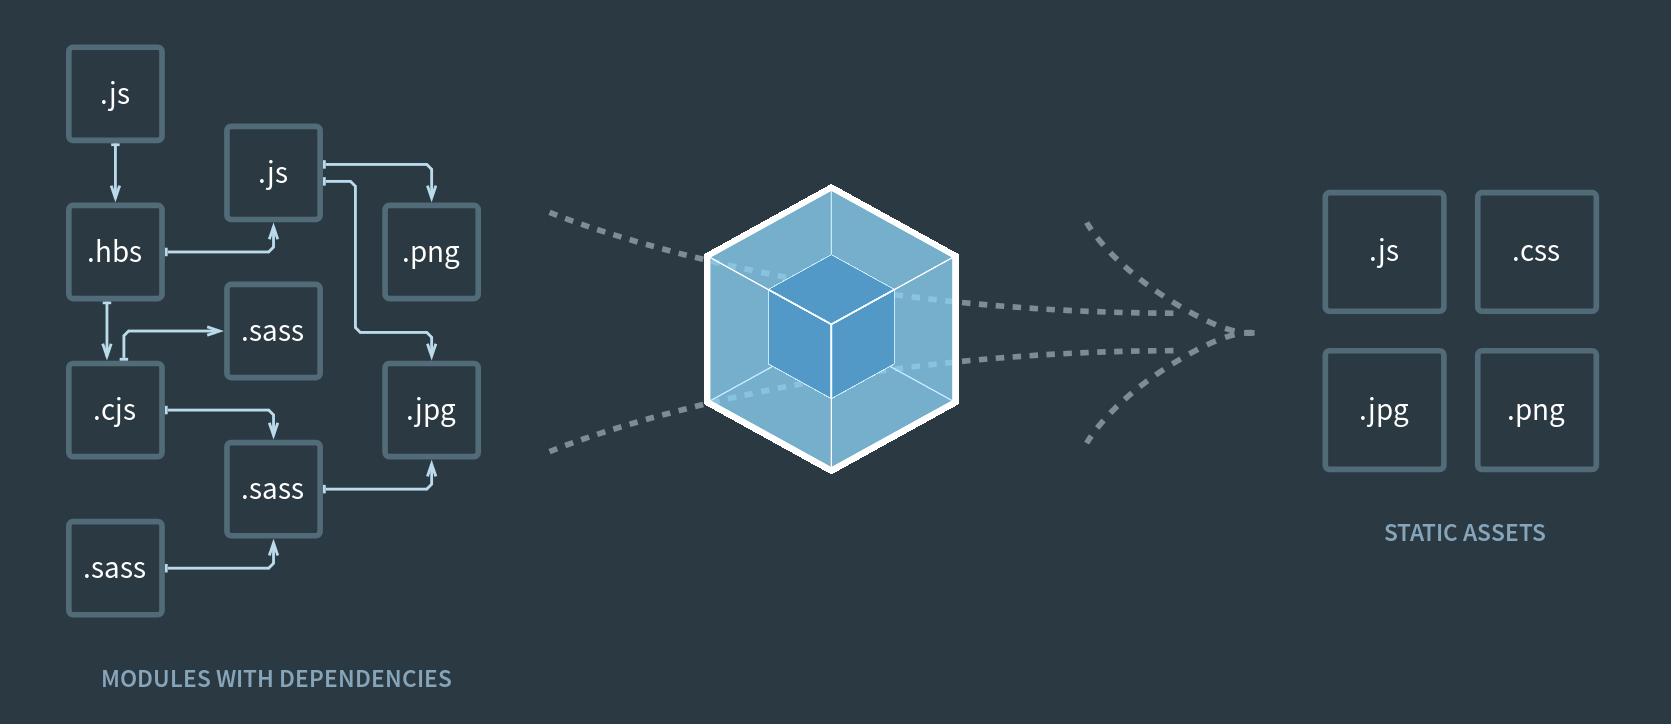
Webpack offer than advantages of being an all-in-one tool that will bundle all your assets into a single (or several) files.
You will just need to fill out a file: webpack.config.js by following the high-quality
online documentation. Here is an example of webpack.config.js:
webpack.config.js
const webpack = require("webpack");

const path = require('path');

const ManifestRevisionPlugin = require('manifest-revision-webpack-plugin');

// Define where all your assets are stored
const rootAssetPath = './assets';

module.exports = {
    entry: {
        // Defines at least one entry point for your program. Here `assets/index.js`
        index: [
            `${rootAssetPath}/index.js`,
        ],
    },
    output: {
        // Define output directory
        path: path.resolve(__dirname, 'static', 'build'),
        // Define naming rules for the output file
        filename: '[name].[chunkhash].js',
        chunkFilename: '[id].[chunkhash].js'
    },
    module: {
        // Define how each file type should be bundled
        rules: [
            {
                // Use regex to match files by filename
                test: /\.css$/i,
                // Define the "pipeline" to bundle the matched file
                use: [
                    { loader: 'style-loader' },
                    { loader: 'css-loader' },
                ]
            },
            {
                test: /\.(svg|eot|woff2|woff|ttf)$/,
                loader: 'file-loader',
                options: {
                    publicPath: '/static/build',
                    name: '[name]-[hash:6].[ext]',
                },
            },
        ]
    },
    plugins: [
        // Creates a manifest.json file containing the mapping from entry point to output files
        // May be convenient for integration with other tools (e.g. Flask-Webpack).
        new ManifestRevisionPlugin(path.join('build', 'manifest.json'), {
            rootAssetPath,
        }),
        // Make jQuery a global variable accessible everywhere in your app.
        // If you use Bootstrap JS, you will need this as bootstrap expects
        // jQuery to be globally defined.
        new webpack.ProvidePlugin({
            $: "jquery",
            jQuery: "jquery"
        }),
    ],
    mode: "production",
};
You assets/index.js may look like (written in ES6):
import BootstrapStyles from "bootstrap/dist/css/bootstrap.css"
import FontAwesomeStyles from "@fortawesome/fontawesome-free/css/all.css"

import jQuery from "jquery"
import moment from "moment"

import "bootstrap"

// ... You application's logic here
As you can see, all imports (CSS, JS, images, etc.) are treated in the same way.
To build your assets for production, run yarn build (or npm build).
To watch your assets and rebuild them as your code, run yarn start (or npm start).
These shortcut commands will run the respective commands defined in the
scripts property of package.json.
In any case, all your resources will be bundled into a single, optimized index.[chunkhash].js,
saving bandwidth and loadtime for your end user.
Moreover, you will never have any headache when managing dependencies.
To upgrade, just change a version number in package.json, then rerun yarn install.
Then audit your code.
Acknowledgements
-
Original link where I found the hilarious meme on top of the page: https://blog.eq8.eu/article/is-rails-still-relevant-in-2018.html.
-
Flask integration: https://nickjanetakis.com/blog/manage-your-assets-with-flask-webpack
